Aluminum fences are among the easiest to install so long as you are thorough, patient and well prepared. Planning is critical, so make sure you devote time to properly measure where the fence will go and make sure you measure your aluminum gates properly since the dimensions on these pieces may vary slightly.
Below are the standard instructions on how to install an aluminum fence. In addition to this, we encourage you to download our How To Order Fencing Guide, which offers diagrams that supplement the instructions.
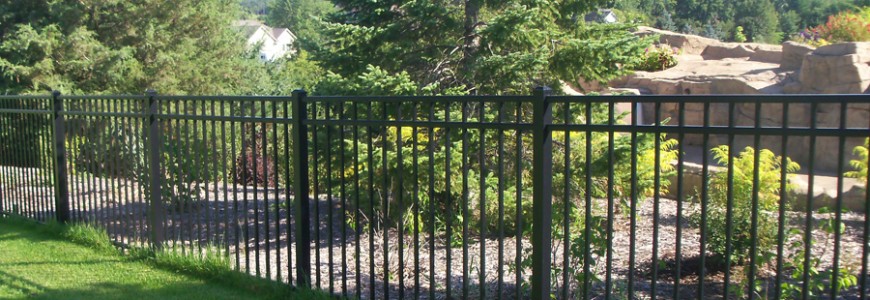
Before Installing Your Aluminum Fence
- Make sure you stake your yard for where the fence will go, distinguishing where you’ll place your posts and where you’ll place your gate(s).
- Check to make sure underground utilities, pool lines, and sprinkler systems have all been located. Calling Miss Utility will save you both major heartburn and money!
- Check all items on the packing list (panels, posts, gates, caps, hinges, latches, paint and screws). If any part is missing, please contact us!
- Identify and separate the four styles of posts: Line posts have holes routed on opposite sides. Corner posts have holes routed on adjacent sides. End posts have holes routed on one side. Gate posts are routed like end posts, but the wall thickness is almost doubled to support the weight and use of the gate.
Important Information Regarding Your Aluminum Fence Installation
- Make sure you install your fence 2 to 3 inches off the ground to allow gates to work properly, and to allow maintenance of grass under the fence.
- All gates are built to fit openings, if your packing list says 4′ gate, then you need to account for a gate with a 4-foot opening.
- When setting gate posts, it is very important to get the opening exact, and gate posts must be topped out bubble level in order for channels to line up with channels on the panels. After you properly set the opening, it’s good to lay a post on top of both gates and posts and set a level on top to ensure that posts are evenly topped out.
- When digging holes to install the fence, your holes should be 6″ to 8″ in diameter and at least 24″ deep. In areas where freezing is a factor, aluminum fence posts need to be below the frost line. It is also a good practice to “bell out” the bottom of the hole to prevent posts from heaving.
- When it is possible, use as many full panels as you can, but if a shorter panel is needed, you can custom cut a panel to any size to accommodate any line. Notch the end of the channel to fit inside the post, use factory notch as a guide. Use a Saw-Z-All or notching tool to make your cuts.
- When inserting panels into a corner post, the channels on one panel need to be cut at an angle so that both panels fit all the way into the post.
Laying Out Your Aluminum Fence
- Layout and install your fence one line at a time. Start at a front corner or beside the house. Drive a stake at each end of the line and run a string line from stake to stake, this will ensure holes are marked in a straight line.
- Mark holes every 73 3/8″ with 2″ posts on center, if there is a gate in the line add 2″ to gate opening when marking, then resume the 73 3/8″ with 2″ posts panel spacing. So, if you have a 48″ gate opening, mark the holes for your gate posts 50″ on center with 2″ posts. (See Figure 6).
- Any sections that need to be custom cut should be at the back of the fence line or up next to the house for the best look.
Installing Your Aluminum Fence
- Now that your line is laid out, dig all of the holes that you marked and place the posts in the holes. Set your first post in the center of the hole and pour your concrete. Level up the post in each direction; re-adjust string line so that all posts will be in center of holes throughout the entire line. Leave posts a little high for topping out purposes. It is easier to knock posts down than it is to float posts up.
- Now that first post is set, insert panel into post, bottom channel first, then the top two channels. Make sure screws are facing in, and that notches are all the way against the post. Screw the panel into the post. Go to the next hole and put panel into post, insert screws, level post up the string, and set this post. Repeat this procedure until the entire line is installed.
- Layout and install the next line just like the first line. Continue this process until entire fence is installed.
- After the fence is installed, topped out and leveled up, it is time to put on the caps. Place caps on posts and gently tap them on with a rubber mallet. Try not to knock posts down or out of level. While installing caps look for scratches or knicks that need to be touched up with paint. Use only the paint your fence comes with so that it matches the powder coating on the product.
After this, congratulate yourself as you have just installed an aluminum fence!
Ready to Buy An Aluminum Fence?
If you’re ready to visit our online store and purchase the supplies for building your aluminum fence, click here to get started. We’ll ship your order to you in just a few days so you can build one of the best fences possible on the market! Got questions? Contact us today!